Applies to: Sales Hub Professional, Enterprise
1. Check your Outlook desktop version for the Sales Tools icon in your Outlook ribbon. If it is not there, click here to download the HubSpot Sales Outlook desktop add-in.
2. Run the HubSpot Sales for Outlook installer (setup.exe). If you come across errors when installing the extension, refer to the installation troubleshooting guide for more information.
3. Restart Outlook and log back in to your account.

Edit Default Settings for Track and Log Features:
Use the Track and Log features to monitor and keep a record of your contacts’ engagement with your emails. Tracking will monitor when contacts open or click your emails. Logging will log a copy of the email and any attachments to the contact’s record in HubSpot. By default, both of these features are turned off.
1. To update the default settings for tracking and logging emails, click the Sales Tools add-in. You may need to be composing an email in order to click this button.
2. A new sidebar will open up on the right. Click Add-in settings.
3. Click Log and track settings.

4. Toggle the settings on or off, based on your preference.

Track and Log Emails as You Are Composing:
1. When composing or replying to an email, click the HubSpot Sales tool.
2. A new sidebar will open to the right. Check the box(es) to track and/or log your email.
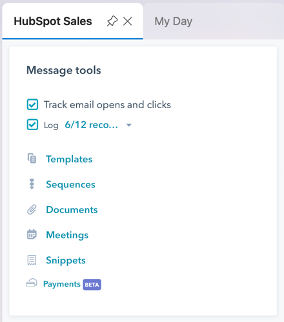
3. From here, you can also click on Templates to use any templates that have been shared with you in HubSpot or ones that you’ve created. To view all templates, change the Owner filter to Any.
4. Toggle the settings on or off, based on your preference.
Features:

- Snippets
- Templates
- Documents
- Meetings
- Sequences (Sales Hub or Service Hub Professional or Enterprise only)
*Screenshots are general and may vary depending on the Hub(s) and/or package(s) purchased.